Our Solar Set Up on our 32' 5th wheel
Solar panels are something I wanted to install since our first camping trip. Making electricity from the sun fascinated me. I'm not sure how much we will use them but I decided I wanted to put them on our trailer for a couple of reasons. The first reason is that I enjoy a challenge and although I have done a lot of "do it yourself" electrical work, I knew nothing about solar power. The second reason is that I wanted to be ready for anything. We want to travel the entire United States in the next couple of years and we will be camping at a variety of different types of campsites. Anything from resort style campgrounds with full hook-ups (Water, Electric & Sewer) to "out in the middle of nowhere" miles away from any power. We just never know what we are going to have available until we decide where we want to go and what we want to see.
So I started researching solar power for RVs. I watched a ton of YouTube videos, read a lot of blogs and joined a couple RV solar Facebook groups. Like most people who know nothing about solar, I thought I could spend a couple hundred dollars, buy a solar panel kit from Harbor Freight and power everything in the trailer. Boy, was I wrong! Here are a few of things I learned.
-- It was a lot more expensive than I thought to have enough solar power to run what I wanted in my trailer.
-- Solar panels are not the only thing you need to go solar. Some of the other items are the mounts, a combiner box, a solar controller, more batteries, a battery box, an inverter, heavy wire, breakers, fuses, battery cables and a battery monitor.
-- It's almost impossible to put enough solar panels on an RV to run your air conditioner. I said almost because there are some people that have done this but the cost was just too much for me.
-- Solar panels are not connected directly to your RV electrical system. The solar panels charge your battery bank then your battery bank powers everything in your trailer that is 12 volts. (lights, water pump, exhaust fans, slide motors, etc.) You need to connect your battery bank to an inverter if you want to run any 120-volt appliances. (anything that plugs into a regular household outlet)
-- The battery that came with your RV will probably power your trailer for a day or two if you are lucky and careful. And that's only the 12-volt items, remember you need an inverter to run 120-volt items and unless your RV has a residential refrigerator, it probably didn't come with an inverter. Most people that install solar panels also replace their battery with 2, 4, 6 or more 6-volt deep cycle batteries. The more batteries you have the more you can run and the longer you will last.
-- It takes a lot of solar panels to charge a large battery bank in a day. I figured 1 watt of solar for every amp-hour of battery capacity. (I have 480w of solar panels and a 450 amp hour battery bank)
-- Solar panels have come down in price the last few years but a total solar set up is still pretty expensive. Especially if you don't do it yourself.
-- If "the sun don't shine" for a couple of days you will deplete your batteries and will have to run a generator to charge your battery bank or go somewhere to plug in. Flooded lead-acid batteries can be damaged if you let them discharge below 50%.
-- Batteries are heavy! I had to reinforce the floor of the front storage compartment in our 5th wheel trailer to support the weight of our extra batteries. Each of my batteries weigh in at 62 lbs. That's an additional 248 lbs in the front of the trailer.
The way I see it is that there are 3 common RV solar set-ups.
#1 Full Timers that love to boondock.
Boondocking, Off the grid, Off the cord, Dispersed Camping, Dry Camping or Wild Camping are all names for camping without any hookups (water, electric or sewer) Full Timers live in their trailers and do not have a brick and mortar house. These people usually stay in the same spot for months at a time, many spend the winters out west and need a lot of solar power to run everything in their RV.
#2 Long-Term Campers
A long-term camper is someone that still has a home somewhere but travels for months at a time. They might be retired or have the summers off. (We fall into this category) These people need a medium-sized solar system to power everything when they boondock. Which will probably be for a week or less before moving on to a different spot.
#3 Weekenders
Weekenders are people that camp on weekends or for short vacations. These people will need a small solar system to keep their battery charged up and power everything for an occasional day or two of dry camping.

Below is a description of a solar system that I installed on our own 5th wheel RV. Everybody has different needs and opinions on what works best for them. I spent a lot of time reading and researching everything I could about RV solar and came up with a system that I felt will work for our needs and our budget. I am not suggesting that what I did is going to work for you. If you are interested in putting solar on your RV please do your own research and make your own decisions. I am posting this hoping that it might help someone else looking for more information.
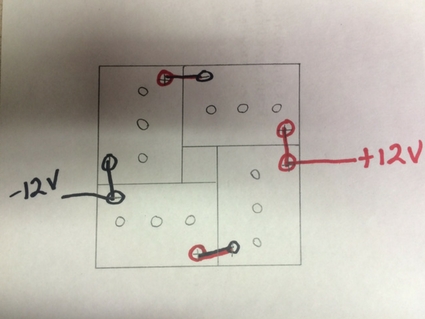
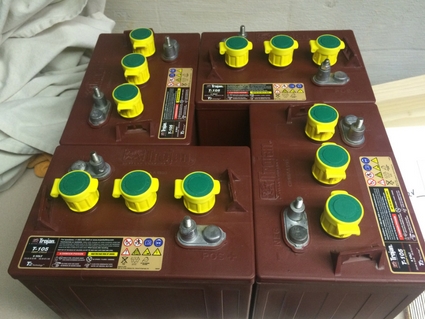
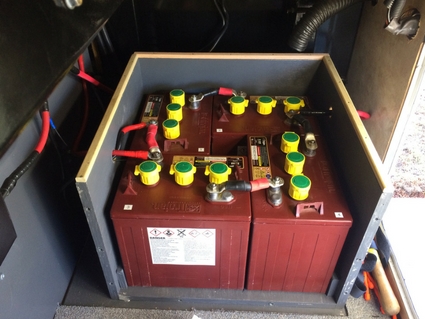
Because of the cost, I decided to build our system in phases which took me two years. The first purchase I made was the batteries. The battery that came with our RV was one 12 volt EverStart battery with 101Ah. This battery was fine if we planned on always camping where there were hookups. But for a solar setup, it had to go. There are different types of batteries that you could use for a solar setup all with their pros and cons. The three main types are Flooded Lead Acid, Sealed AGM, and Lithium. I decided to go with the Flooded Lead Acid. They are the least expensive of the three but require more maintenance in the form of watering, equalizing and keeping the terminals clean. They also have to be vented to the outside because they give off hydrogen gas as they charge. But this was not a problem for me because the batteries will be easy to get to and will be inside a battery box that is vented. In May 2016 I bought 4 - 6 volt Trojan T-105 Deep-Cycle Flooded Batteries. I bought these from a local Trojan distributor at about $170.00 each. The Amp Hour capacity of each battery is 225Ah. These are 6-volt batteries so I wired them in series and parallel. By wiring 2 - 6v batteries in series this gives me 12 volts. (what the trailer requires) Then by wiring the two sets of two in parallel, this doubles the Amp Hour capacity to 450Ah. Basically now I have one giant 12-volt battery with 4 times the capacity of the battery that came with the trailer.
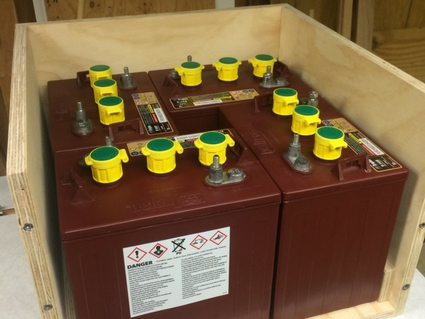
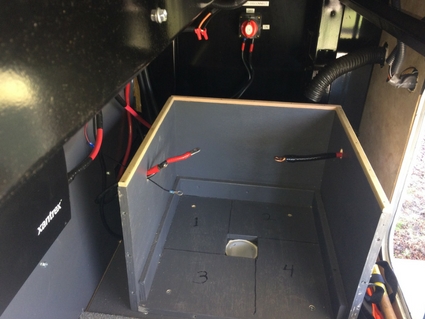
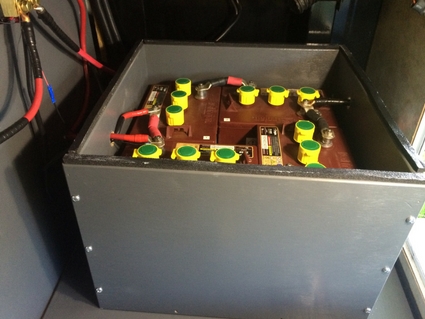
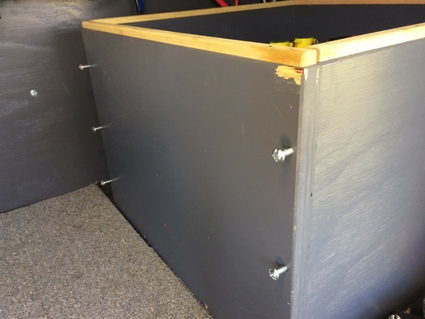
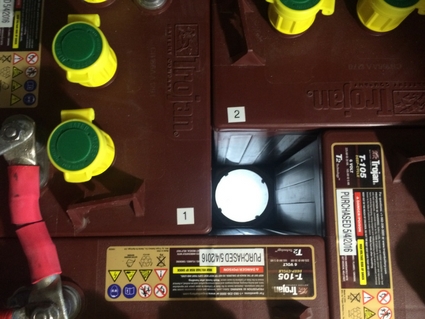
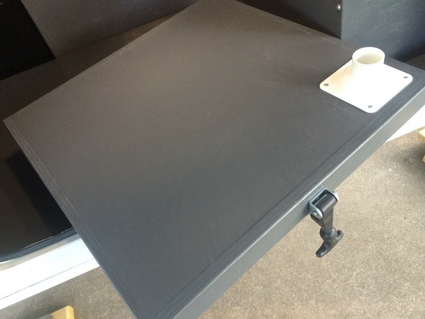
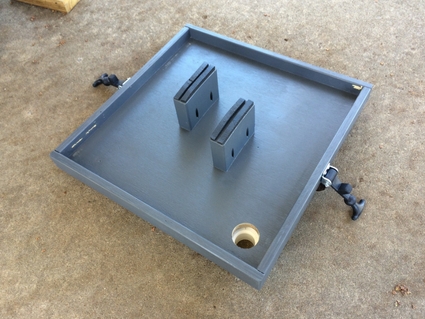
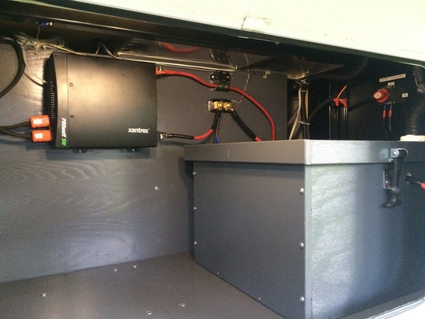
Once I got the batteries I needed a box to put them in so they would stay in place as we traveled. After looking around the internet I decided to build one out of wood. I built this to the exact size I needed with space around the batteries for air circulation. One side of the box is easily removable so I can slide the batteries in and out as needed. The lid is held on with two rubber hood hold downs purchased off of Amazon. Because of the way the batteries sit it allowed me to cut a 4" hole in the middle of the bottom for venting. I also cut a hole in the lid and attached an RV vent and hooked it to the original vent hose from the old battery. This worked out pretty good and is mounted on the right-hand side of the front storage area. I also attached a couple pieces of wood on the inside of the lid to keep the batteries from moving up and down. When the lid is on, these push on the top of the batteries and keep them from moving. I purchased 24 Water-Miser battery vent caps which are supposed to reduce watering intervals by 50%. I'm not sure if I really needed these but I read good things about them. If you're interested you can check them out HERE. These were $5.25 each. I also reinforced the storage area floor with the same 3/4' plywood that I used to build the battery box. And put a plywood wall at the back of the storage area to mount all the electronics of the solar setup.
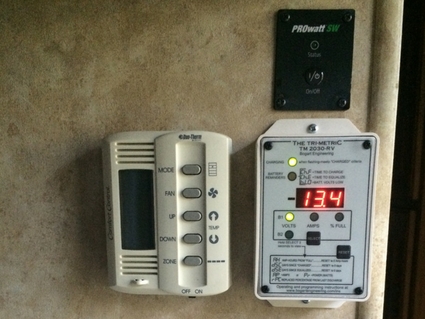
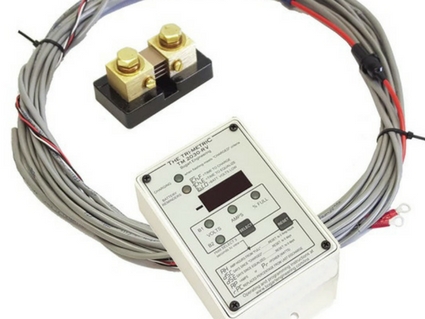
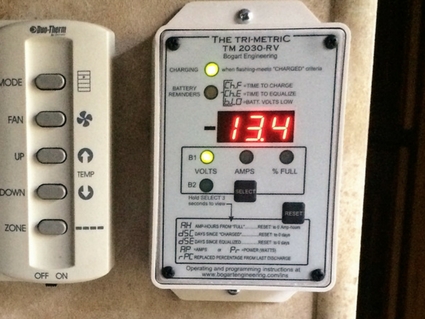
The next purchase was a battery monitor. With a solar set up you have to know the status of your batteries at all times. In order for your batteries to last a long time, they can not be over or undercharged. After a bit of research, I bought a TriMetric TM-2030-RV battery monitor with all the wiring and a shunt. The cheapest price I found was on eBay. $212.00 for the kit. This monitor is very accurate and shows me how much energy is left in my batteries along with how much my loads are drawing, the voltage of the batteries, how much charge I'm getting from the panels and lots of other information. If you want to read more about this battery monitor CLICK HERE.
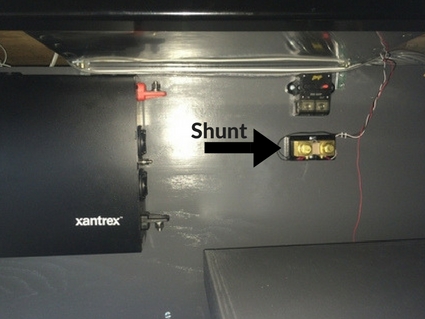
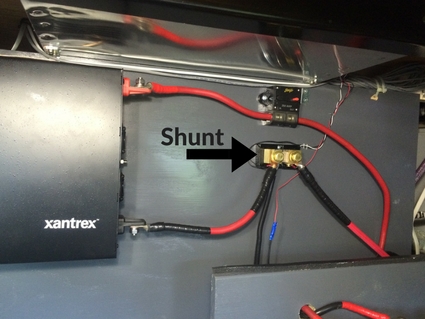
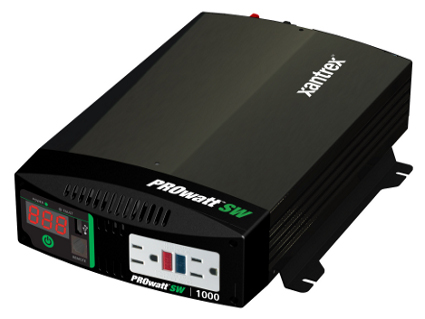
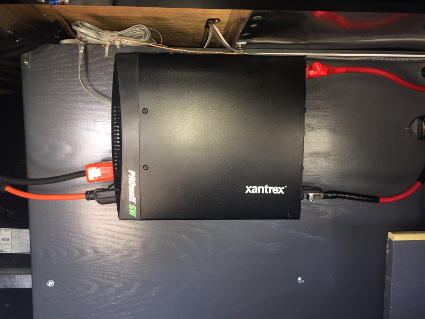
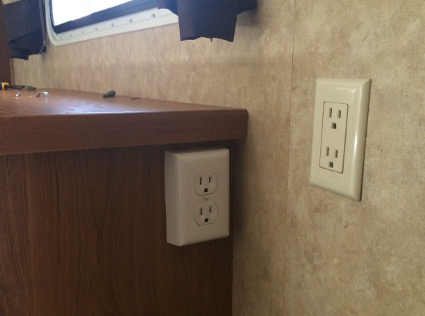
Once I got the battery monitor hooked up the next item I purchased was an inverter. The batteries supply 12 volt DC power to your lighting, fans, water pump and slide motors but if you want to run anything that plugs into a wall outlet you need an inverter. We needed it to run things like the TV, DVD player, toaster and numerous chargers for our computers and cell phones. The inverter takes the 12 volt DC power from the batteries and changes it to 120 volt AC power. There are 2 type of inverters, a modified sine wave, and a pure sine wave. After researching I learned that the pure sine wave is better for electronics. I bought a Xantrex ProWatt 2000 Pure Sine Wave inverter with a remote switch from Amazon. Total cost $366.54. I mounted the inverter very close to the batteries and mounted the remote switch in our kitchen area. This makes it very convenient to turn on when we need it. You don't want to leave the inverter on all the time because it draws a little battery power even with no load. Now there are many ways to get the power from the inverter into the trailer. Some people wire it directly to the trailers distribution panel which means that every wall plug in the trailer will have power when the inverter is on. After researching this method it was a little too confusing and above my electrical skill level. We are not going to live in our trailer full time so I decided that I would just run 3 wall plugs from the inverter. I put one near the rear entertainment center, one near the kitchen cabinets and one in the bedroom. Everything we would need to plug in would be close to one of these plugs. I just bought electrical cord (the same as an extension cord uses) and put a male plug on one end which plugs into the inverter, ran it under the floor, brought it up to where I wanted it and put a surface mount wall plug on the other end. These three plugs are "hot" when I turn the inverter on. Everything worked great and with our travels in 2016 I experimented with everything I had installed. I felt that this setup would work out great for our style of camping.


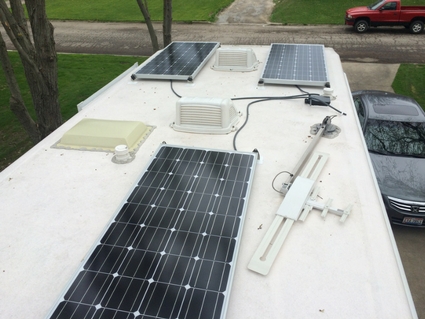
Once we got the trailer out of winter storage in mid-April 2017 I was anxious to start working on the solar again. I bought three 160 watt solar panels for a total of $480.00, a Bogart SC-2030 solar controller for $121.80 and a temperature sensor for $12.60. All off of eBay. The solar charge controller is made by the same company as my battery monitor and the two work nicely together. A charge controller or charge regulator is basically a voltage and/or current regulator to keep the batteries from overcharging. It regulates the voltage and current coming from the solar panels going to the battery. Most "12 volt" panels put out about 16 to 20 volts, so if there is no regulation the batteries will be damaged by overcharging. I also purchased stainless steel mounting hardware, wiring, connectors and a combiner box from AM Solar in Springfield, Oregon. I bought the rocker mounts that allow the panels to be tilted if need be. Total bill was $450.00. They were very helpful and have everything you need for an RV solar installation. A little pricey but everything is very high quality. If you are interested, check out their website.
AM Solar, RV Solar Specialists Since 1987
Before I ordered the panels I made sure they would fit by cutting out some cardboard the same size as the panels and placing them on the roof. Every RV roof is different and because of the vents, air conditioners, antennas, and skylights, the mounting positions will be different. I had room for 2 panels side by side over the front bedroom and 2 more panels over the kitchen area. I'm only mounting 3 but if I decide I need another one it will fit and will be easy to add later.


I started wiring the panels by following the instructions from AM Solar YouTube videos. I bought 3 of their panel prep kits that include the butt splices, heat shrink, and wire attachment points. I also bought 24' of their 10/2 roof wire. It's custom designed for AM Solar with a UV resistant jacket and a round profile that creates a tight seal through a watertight strain relief, this is the cable runs from the solar panels to the combiner box.

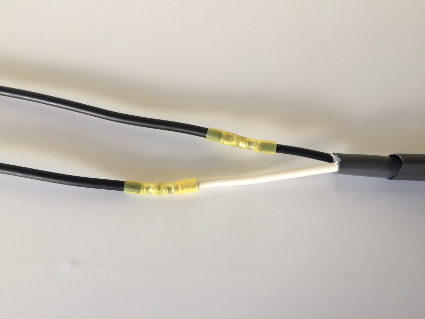


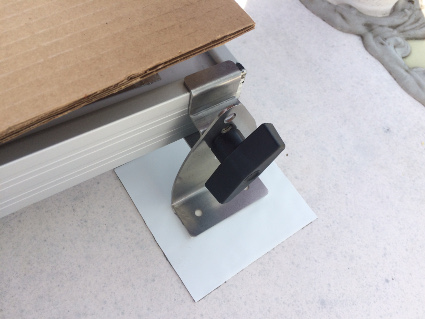
After I got the panels wired I mounted the stainless steel rocker feet to the panels. AM Solar also has a very good video on how to do this.


Once I had the panels ready I placed them on the roof. After I had them in position, I took a sharpie marker and outlined the mounts and moved the panels. There's a lot of discussion on how to mount solar panels on an RV. My RV has a rubber roof over plywood. I decided to use stainless steel screws and screw them through the rubber and right into the plywood. Each mounting bracket has 2 holes so each panel will be held with 8 screws. I put the bracket into position, drilled the holes, placed a piece of ErternaBond tape under the bracket and then put the screws in. I'm pretty sure this was the best mounting option for me. After I had all the brackets mounted to the roof I covered the entire bottom with Dicor self-leveling lap sealant to prevent leaks.
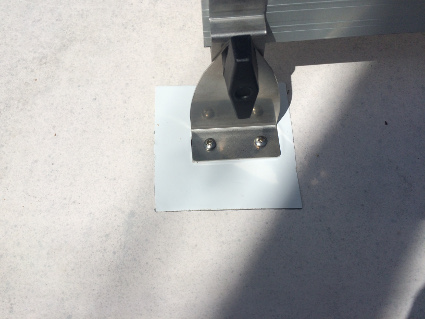


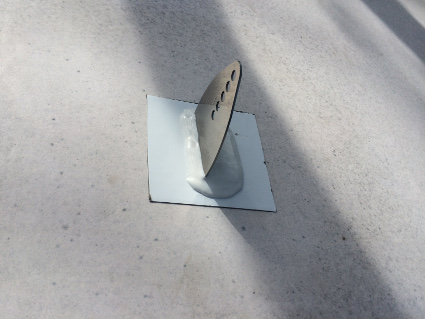
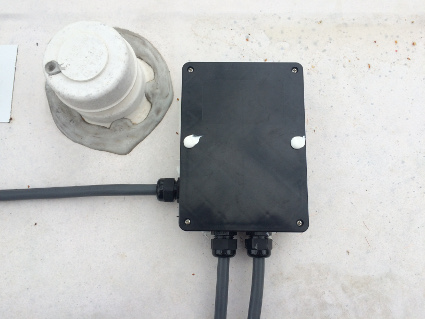
Now that I had the panels mounted I had to get the power from the panels to the batteries. The three panels had to be connected together and then route the power from the roof to the front basement area. I accomplished this with a combiner box that I purchased from AM Solar. A combiner box houses the parallel connections that are necessary when multiple solar panels are used in a system. A combiner box also provides an easy access point for future panel additions and is typically located over the roof penetration. The weather-tight strain reliefs ensure a watertight seal where the wires enter the box. Luckily in my RV, there's a floor to ceiling cabinet between my kitchen and bedroom. I could drill a hole through the roof and right into this cabinet. The vent pipe from my black tank also runs through this cabinet and I could zip tie the wire onto this pipe.
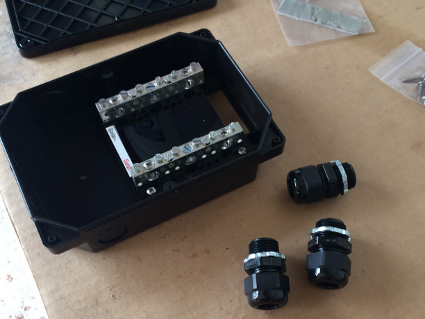
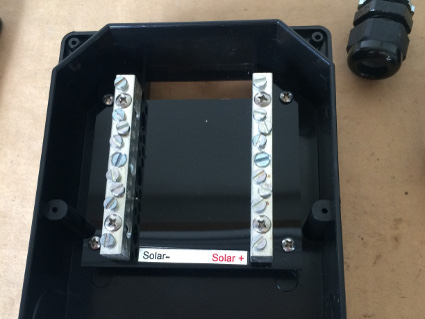
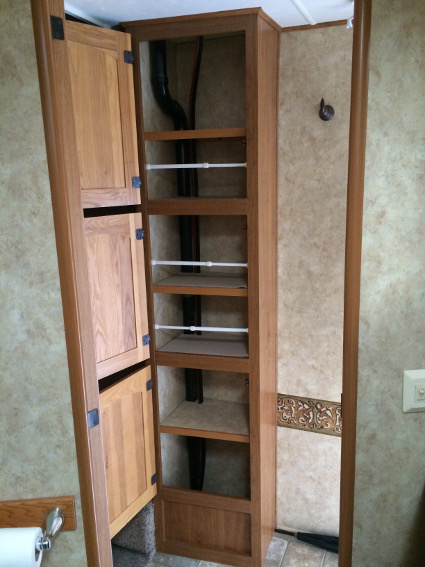

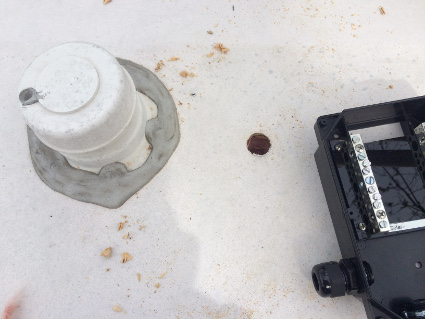
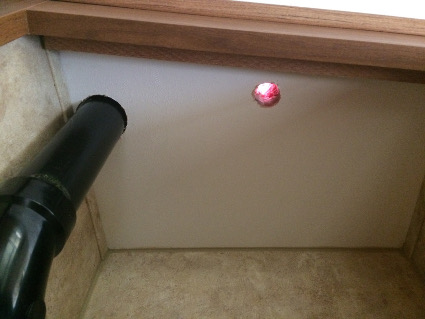
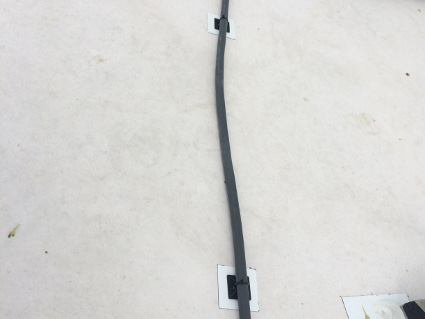
I used more Dicor self-leveling lap sealant under the combiner box and screwed it to the roof over the hole. I'm using 4/2 wire (which I bought from AM Solar) to run from the combiner box to the solar controller. So I brought that up through the hole, stripped the ends and attached them inside the combiner box. Then used more Dicor all around the box. Then set the rooftop wire where I wanted it and connected it inside the combiner box. Screwed on the lid and was done. I also used a couple of wire holders to keep the roof wire from moving around after I made sure that I had enough slack for tilting the panels. I put a piece of EternaBond tape down and the wire holders just stuck to that. The wire is held on with a zip tie.
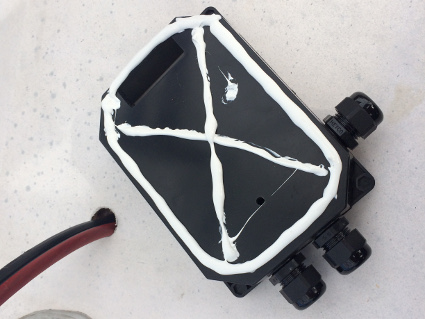
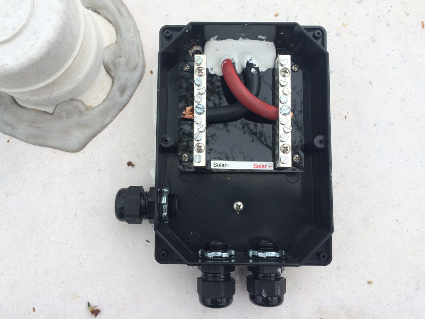
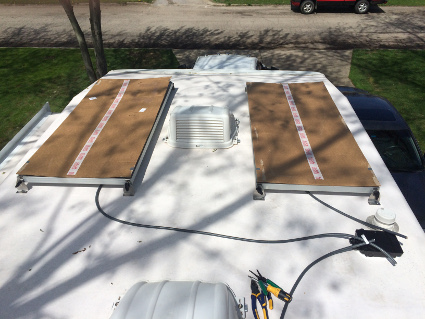



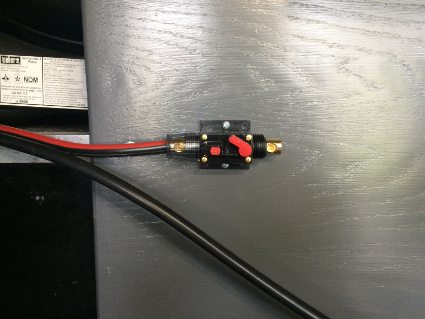
In the basement area, I ran the 4/2 wire to the charge controller, then to the batteries. As you can see in the pictures below I also added a couple of breakers. I have one between the panels and the charge controller, one between the charge controller and batteries and one between the batteries and inverter. I also have a battery disconnect switch.
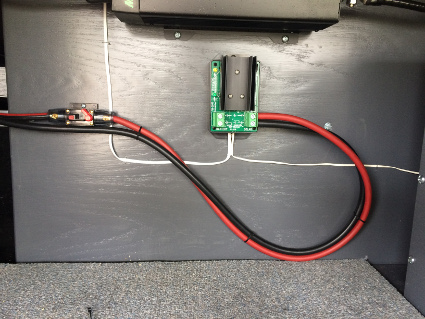
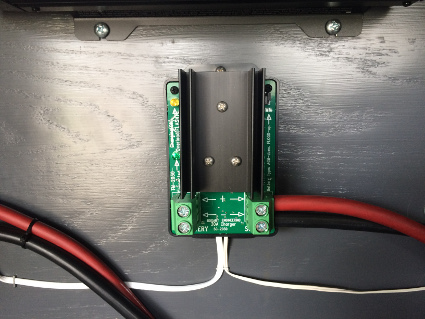

The finished product!
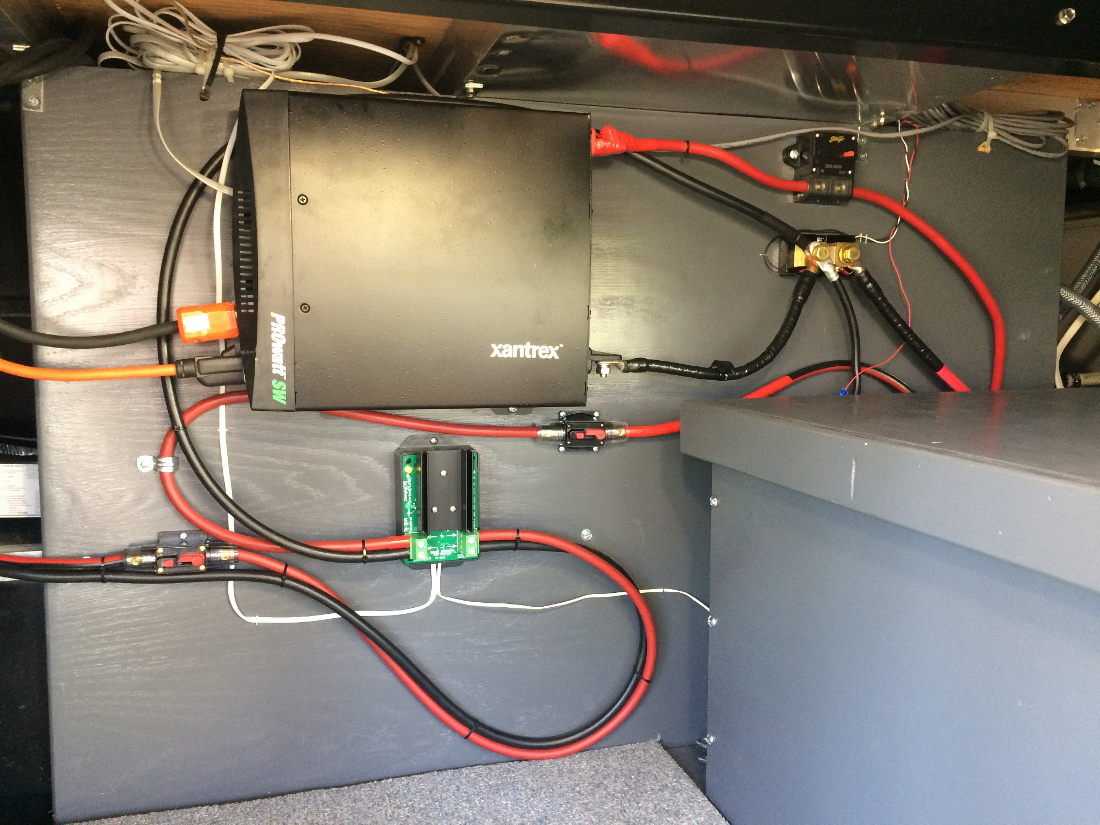
Now the big question is: What did this all cost me? Here's a breakdown and total.
4 Trojan T-105 Deep-Cycle Batteries, $677.00
24 Water Miser Battery Caps, $126.00
Bogart Trimetric TM-2030 RV Battery Monitor, $212.00
Xantrex PROWatt 2000w Inverter, $367.00
Xantrex PORWatt Remote Switch, $22.00
3 160w Solar Panels, $480.00
Bogart SC-2030 Solar Charge Controller and Temperature Sensor, $135.00
SS mounting brackets with knobs, wire, combiner box, connectors, $450.00
Misc. items, plywood, rubber tie downs, vent, extension cord wire, 3 surface mount plugs, paint, hardware, breakers, and battery disconnect. $282.00
Total: $2,751.00
In 2017 we traveled mostly east of the Mississippi and didn't boondock at all but I did experiment with the system by not plugging in at some of our campsites. It all worked as I planned! We could use everything we needed except the air conditioner. Some nights we would watch a couple hours of TV, charge all our electronics, use any light we wanted and the battery bank never went below 70% before we went to bed. And once the sun came up we were 100% before 1:00 PM. In 2018 we have plans to be out west for a couple of months so I can really put it to the test.
In 2018 we did travel out west for a couple of months but didn't get to use the solar system very much. We were scheduled to be in Southern California near the end of May and we spent most of June and July in the South West United States. With temperatures as high as 107° we stayed at campgrounds that had full hookups so we could use our air conditioning. Again, we would use it off and on - here and there, just because we could - but we never had to rely on it.
Do I think it was a waste of money? Well, we still have a lot of places we want to visit in the next couple of years and hopefully, we will eventually stay places without any hookups so we can get the whole solar experience. So right now I don't think it was a waste of money but if you are considering solar, my advice is to only spend the money if you are sure you will be using it.
Questions or comments? Contact us today.
